Superior Walls
- There is no waste or debris on the job site.
- There is a permanent barrier against sidewall water penetration.
- Built in insulation which is superior to other materials.
- Inside walls are ready to finish: electrical, plumbing and drywall, and more insulation if desired but it is insulated enough on its own.
- Since we are working with a 15 sided structure the foundation is more precise (extremely important).
This graphic is the property of Superior Walls.
We included it here to show the details. (click to enlarge)
Here is the fast version of how it all came together.
If you couldn't open the video here are the highlights.
The perimeter it tamped down and checked to be sure it is level using a transit.
The transit is so cool. A laser beam sweeps the area (the three legged thing in the distance) and someone holds a pole that beeps according to how close you are to being level. A solid beep indicates dead level but fast or slow beeps mean you are off.
All measurements spring from the "bench mark" - the center point of the house (far left). Every wall is roughly laid out and a long bolt is placed to mark each corner. After the first time around they were only 2 inches off.
One of the walls on the north side of the house runs east/west. Jim let the crew know which wall to start with so the whole house will end up being on its proper orientation for passive solar and view.
After the rough measurements, the crew position two angled rebar stakes per wall and recheck the level again.
One of the crew rakes the gravel to fill in any gaps between the rebar.
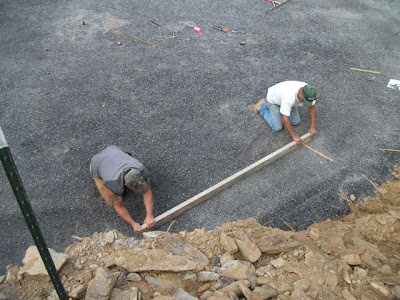
They use a flat beam for final smoothing of the gravel.
Once everything is perfectly level the rebars are removed.
Now they are ready for the walls.
This whole process only took about an hour. Even with all the leveling they did, the crew said it could take several additional hours if the gravel isn't ready.
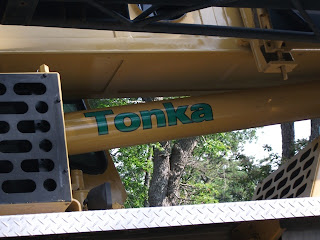
The crane arrives. This one is nicknamed TONKA because it is a small one. You an tell how much our property slopes by how much leveling had to be done to get the crane stable.
The walls arrive on three truck loads and one by one are hoisted by the crane.
The first wall is positioned, the angle is checked, and it is secured with a stabilizing pole.
As each wall is added its position is adjusted for accuracy. An adhesive caulk is applied to the edges where the walls come together.
The walls are bolted together top and bottom.
Caulk is added to the outside and inside seams and the top.
3/4 done!
The last wall slides perfectly into position.
Jim climbs on to check out the view.
Just add some plexi-glass and water and we are ready for Shamu!


No comments:
Post a Comment